

อันนี้เป็นเกร็ดเล็กๆน้อยๆสำหรับการทำให้ภาพดูดีขึ้น(เอาไว้ถ่ายละครซิมได้ครับจะทำให้ภาพดูหน้าสนใจขึ้น)
มาดูวิธีทำกัน
1.เป็นวิธีปกติที่คนส่วนมากใช้กันดูได้จากลิงค์ด้านล่าง
http://ifreephotoshop.blogspot.com/2010/11/focus-photoshop.html
ถ้าใครดูวิธีข้างบนแล้วจะบอกว่ามันยุ่งยากก็คงจะไม่แปลก
มาดูวิธีทำกัน
1.เป็นวิธีปกติที่คนส่วนมากใช้กันดูได้จากลิงค์ด้านล่าง
http://ifreephotoshop.blogspot.com/2010/11/focus-photoshop.html
ถ้าใครดูวิธีข้างบนแล้วจะบอกว่ามันยุ่งยากก็คงจะไม่แปลก
ฉะนั้น!!!งั้นเราจึงต้องมีวิธีที่ 2 สำหรับคนขี้เกียจ(จคกท.เอง) แต่คุณภาพของภาพที่ได้ไม่ค่อยต่างกัน
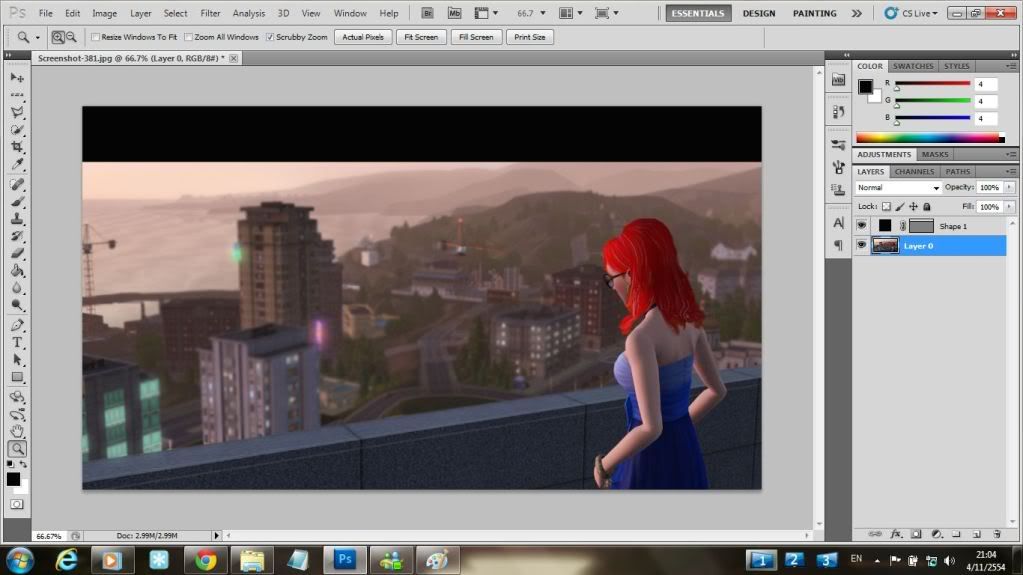
1.เปิดภาพที่ต้องการ (พอดี จคกท.ทำละครอยู่แต่ภาพมันยังดูไม่ค่อยโดนใจเท่าไร)

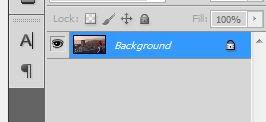
2.ดับเบิ้ลคลิกที่ Backgruond เพื่อปลดล็อก
กด OK
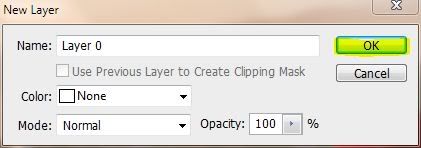
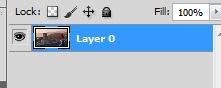
จาก background จะกล้ายเป็น Layer 0
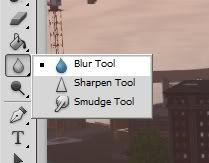
3.ขั้นตอนนี้เราจะใช้วิธีที่มักง่ายที่สุดใน 3 โลกเพื่อทำโฟกัสให้ภาพกัน
กดที่รูปหยดน้ำในรูปแล้วก็เลือกหยดน้ำเหมือนเดิม(แล้วจะพูดวนทำไมเนี่ย )
)
)
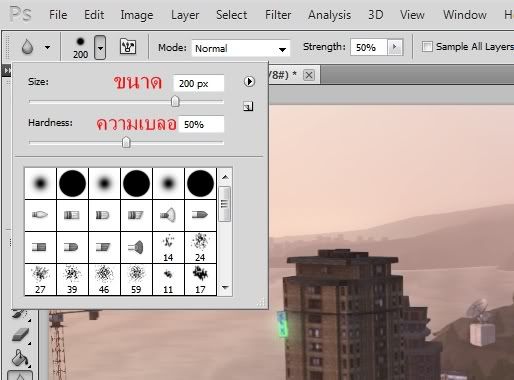
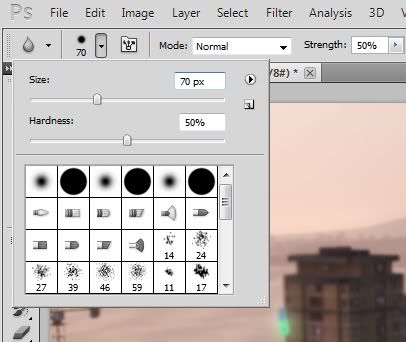
ปรับขนาดกับความเบลอตามในชอบในที่นี้ จคกท.ใช้ ขนาด 200px ความเบลอ 50% เพราะจขกท.อยากใช้
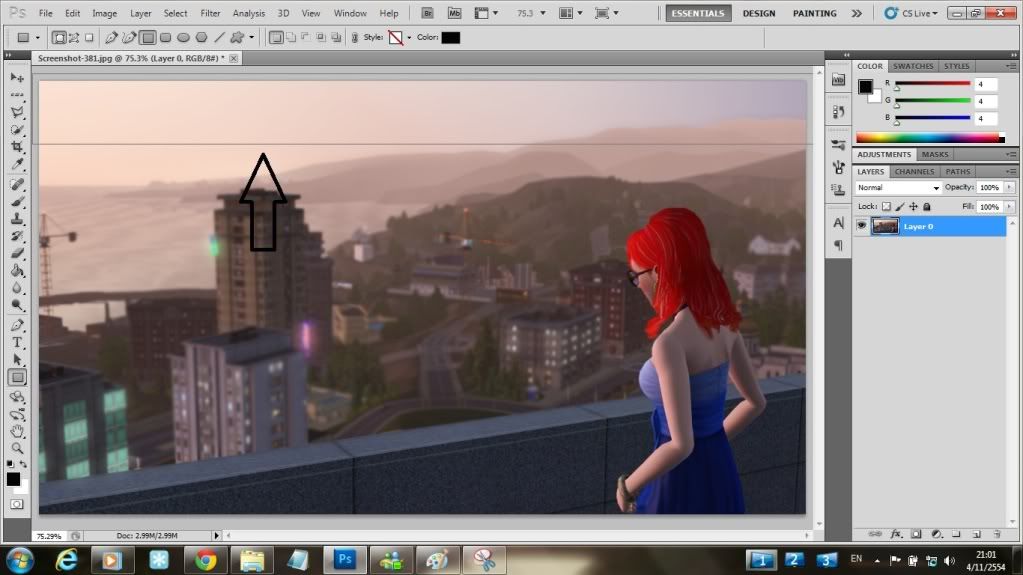
จากนั้นก็ละเลงใส่ตัวตึกซะอย่าให้โดนคนมากเกินไป แล้วก็กำแพงด้วยอย่าโดน
ตรงที่เป็นช่องแคบๆก็ปรับขนาดหยดน้ำให้เล็กลงตามไปด้วย
ตรงที่เป็นช่องแคบๆก็ปรับขนาดหยดน้ำให้เล็กลงตามไปด้วย
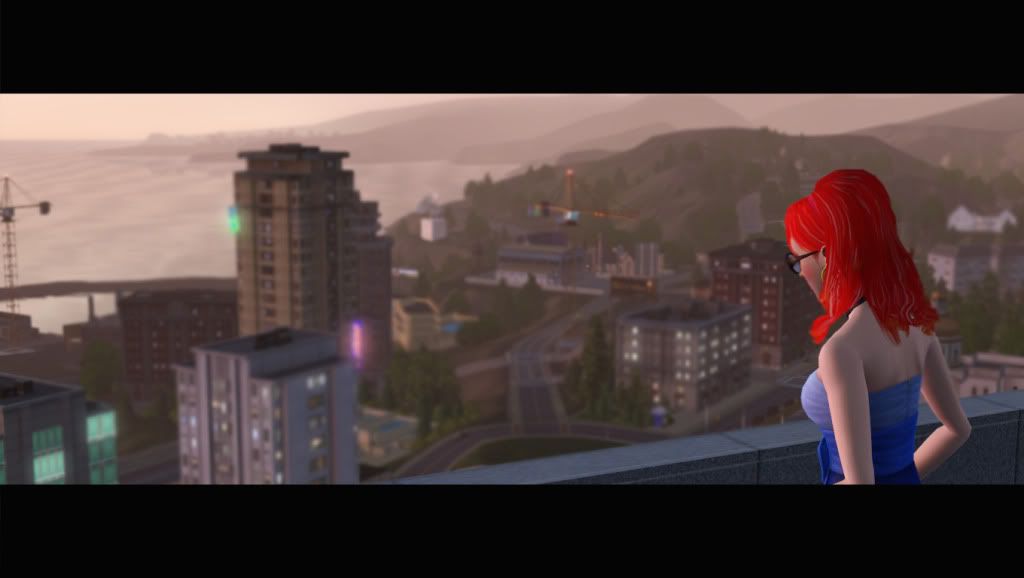
ผลที่ได้คือ
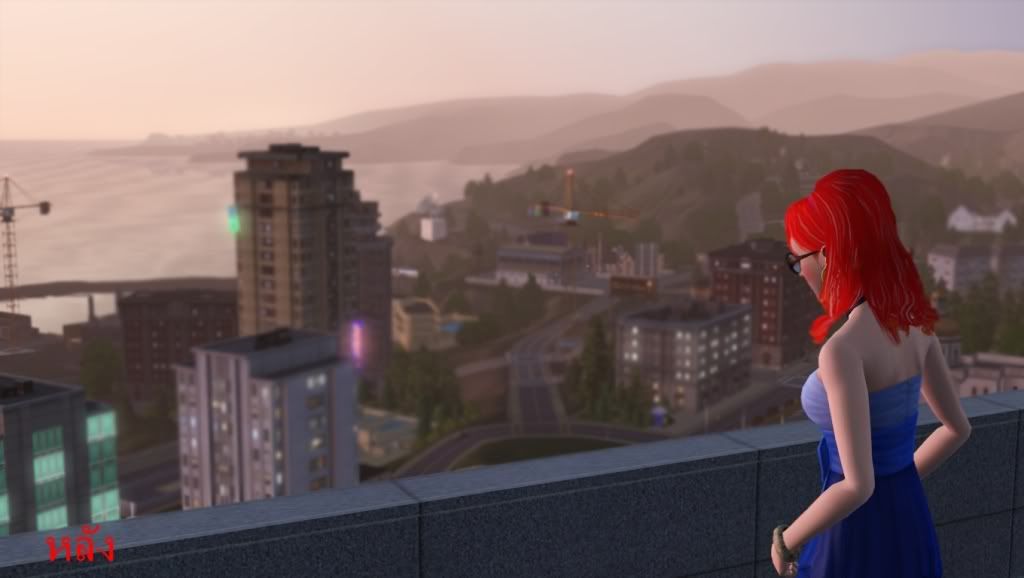
จะเห็นว่าตัวตึกจะเบลอๆ ส่วนตัวของผู้หญิงกับกำแพงจะดูเด่นๆ
ถ้าภาพมันยังไม่ถูกใจให้ลองทำแบบนี้ดูก็ได้(อันนี้ จขกท. ลองมั่วๆ )
)
)1.กดที่เครื่องมือรูปสีเหลี่ยมๆในรูปส่วนสีให้เป็นสีดำ

2.เอามาครอบด้านบนของรูปเพื่อที่เราจะทำขอบดำๆ(ไม่รู้จะเรียกว่าอะไร )
)
)
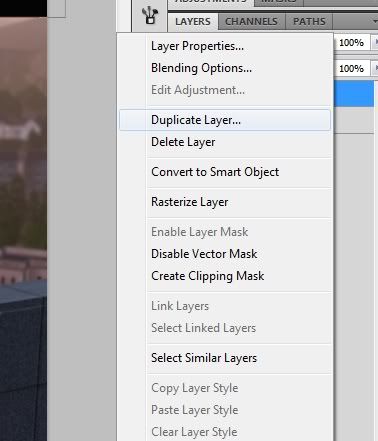
3.เมื่อได้ด้านบนมาแล้วเราก็จะมาทำด้านล่างกัน โดยคลิกขวาที่ shape 0 แล้วเลือกตามรูปภาพ เพื่อทำการก็อปเลเยอร์
กด OK

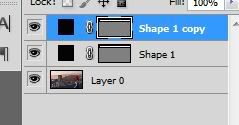
จากนั้นเราก็จะได้ shape 1 copy
4.คลิกเครื่องมือในภาพ

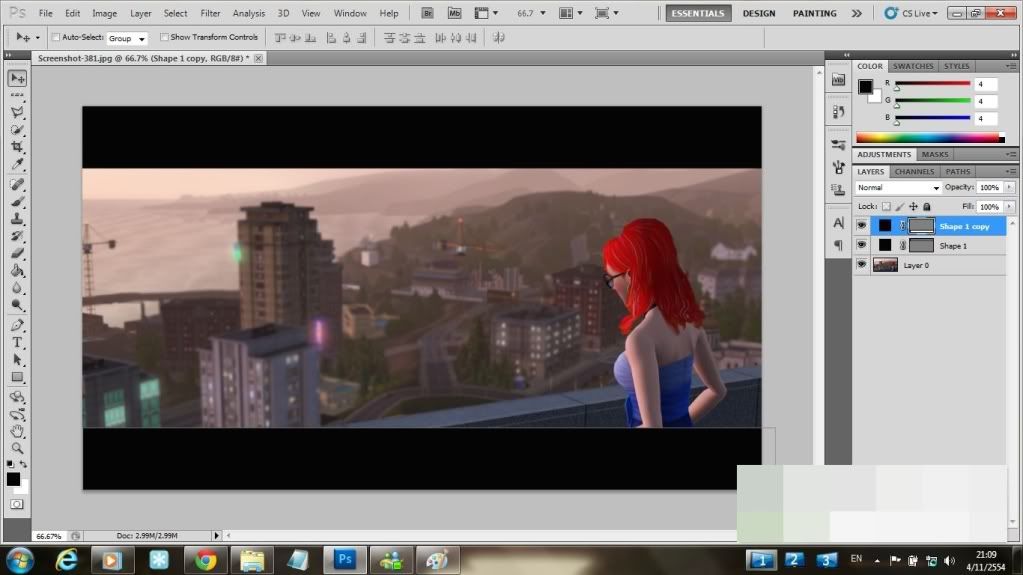
5.ทำการลากสีเหลี่ยมดำใน shape 1 copy ลงมาข้างล่างภาพแล้วจัดให้เท่ากัน
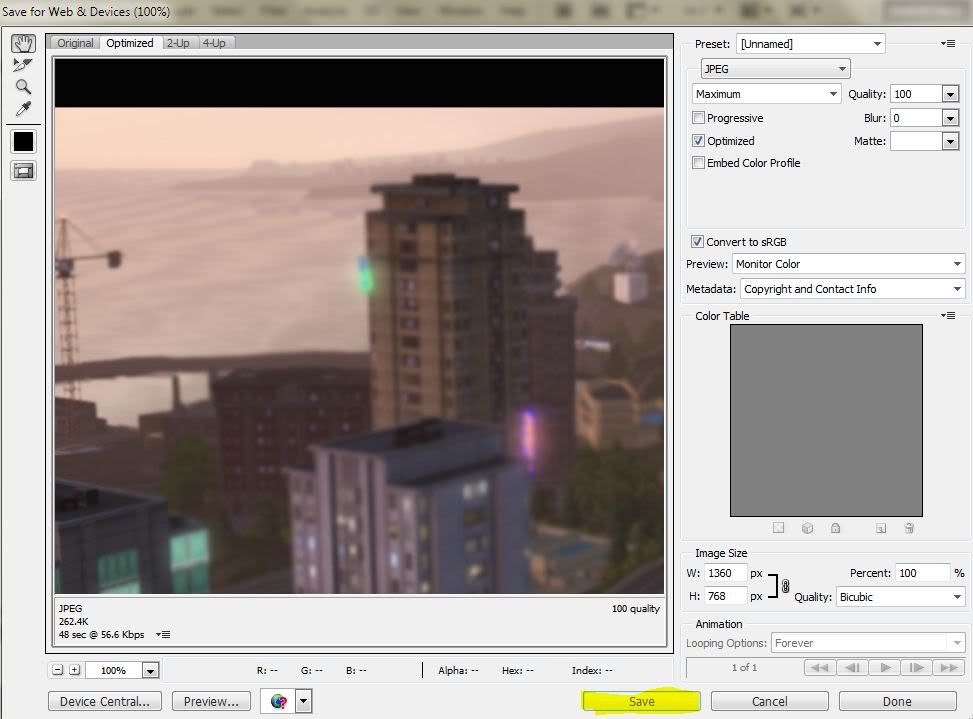
จากนั้นทำการเซฟรูปโดยกดคำสั่งในภาพ
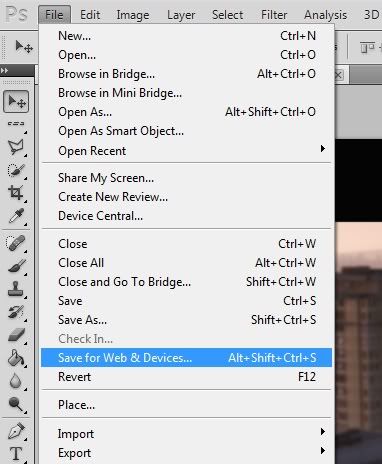
จากนั้นกด save
และนี้คือภาพที่ได้จากวิธีกากๆของจขกท.


 EasyA
EasyA


 ขอบคุณ ๆ ๆ ๆ ๆ มากกกกก ค่ะ